
My first real test of my 3D modeling skills. This steel guitar is built to scale and is a Martin D-35 just like Johnny Cash played. Here’s a modern reproduction.
I have been learning the fundamentals of 3D modeling for unrelated purposes. Its been a passion project learning the facets of Blender. A world of things to be learned in that program alone. Each tab essentially requires a skill set. It takes a little bit to get a hold of things, but its a lot of frustrating fun. I’ll never have time to master it, but I doubt many do. Even those who professionally use it, are often showing something that they themselves just learned in the videos they upload.
I’d compare it to welding in a way. It’s easy to specialize in a certain thing. People become known for specific things. You can do so many individual things with both that its easy to specialize in something specific.
Anyway, Blender is entirely free and entirely cool. Its used for lots of things, the biggest “everyday” thing being 3D printing. If you’ve ever wondered where the models come from, this and programs like this is the source. It does so many things, but I’ll let you figure that out on your own.
3D Guitar + CNC Plasma + Welding = Steel Guitar
This all started because a friend wanted a mailbox post. I was asking around for people that wanted something random and cool made. I let them weigh in on what they wanted and I started that work. It would have been a simple outline of a guitar.
The outside shape, some bars for strings, and a circle for the sound hole. I made the parts for it, and I knew in my heart of hearts someone would destroy it. It would have been so delicate and holding a mailbox.
I think the temptation to destroy would have overtook someone. They would have bent it right over, and with relative ease.

I told him my reservations and asked if we could do something different. I asked for a little more artistic license. He said go for it. Awesome!
3D Modeling
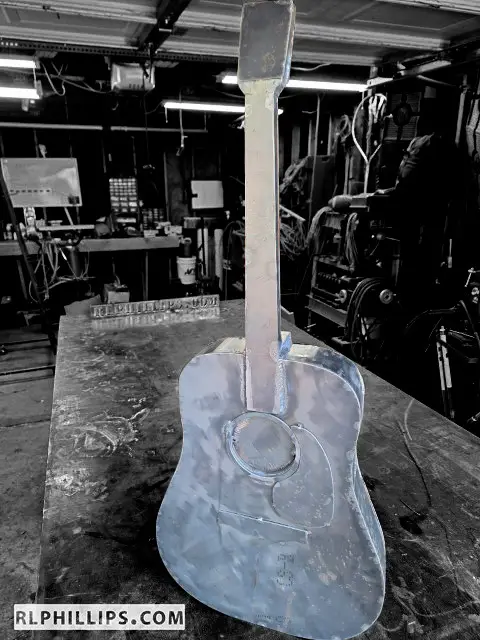
I started modeling a D35, not because of Cash. Because its my buddies personal favorite guitar. This was a great test of everything I had learned to this point. I knew different tips, tricks, strategies, whatever you want to call them. But to this point I hadn’t had a practical test. A simple “you have to make this now” situation. Using reference photos for scale and detail I made this.


This is a solid shot of the same 3D model
After building the model, it was time to break the model. This is where I actually started to generate a file that can be used for cutting. Breaking down everything into a flat pieces and arranging them for efficient use of material. Blender can’t actually generate a cut file, but I can generate an image from it. From there it is ready for further editing. Convert and cleanup the image and we’re ready to cut.

Fabrication
After cutting we can start fabrication. I’ll call it fab, for the rest of this piece. I typically start with the path of least resistance. Whatever offers me the most support for the next piece.
There are a few ways these side pieces can be done. I went this route to keep time and costs down. Rolling them through a sheet roller would have given a smooth surface but taken much more time hand fitting.

You can see the relief cuts in the back here.

I chunked it out and kept putting on parts working my way through the major pieces. This basically went up from the body into and up the neck.


This project isn’t completely done, but almost. As soon as it is I’ll update this post!